|
More AF4 |

|
Chuck,
I wanted to send you a few photos with some updates
about my AF4. Progress is speeding up a bit since
summer is in full swing. I have finished the entire
hull assembly and coamings are now in place. My wife
raised a question about seating, and I was quick to
respond that "AF4's don't have fixed seating".
She gave me a puzzled look, and without another word
being spoken, I realized that "MY" AF4 will
have fixed seating. I brought up the fact that it
would eat up too much interior space, but after a
few measurements and a few more cardboard templates,
I realized that it would "work".
 |
She gave
me a puzzled look, and without another
word being spoken, I realized that "MY"
AF4 will have fixed seating.
(click
images to enlarge) |
|
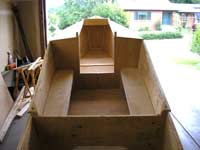
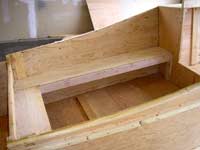
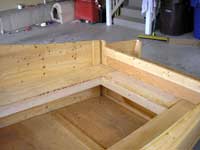
I have included a few images of the
seats that I built. I made them simple and easy. They
consist of a 2x4 on it's side for the front edge of
the seat for strength, and a 1x2 along the hull to
support the seat top. I used ply for the seats themselves
and continued the seat in a "wrap around"
style and attached it to the rear bulkhead. It is
overbuilt and will have all the seams taped and set
in epoxy for smooth seams when it's done. I was not
too precise when cutting the ply around the butt blocks
and framing due to the fact that it will be hidden
after taping. After building the seats and sitting
down at the rear bulkhead, I realized that I liked
the arrangement since it made the process of tiller
steering easier for me.
| I used ply
for the seats themselves and continued the
seat in a "wrap around" style
and attached it to the rear bulkhead. |
|
|
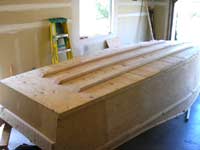
I also included an image of the bottom
after I cut and attached the stiffeners/skegs into
place. They are glued into place and have screws into
the bulkheads and butt plates as well. I will fillet
these with epoxy, and tape them into place. Since
I am going to glass the entire bottom, they will be
there forever after glassing. I elected to use 3 skegs,
with the center skeg extending a bit further forward
than planned. I have the tendency to beach a bit more
than some, and I liked the idea of having a wood skeg
there. I did stop them just aft of the rear bulkhead
as Jim suggests.
 |
I elected
to use 3 skegs, with the center skeg extending
a bit further forward than planned. I
have the tendency to beach a bit more
than some, and I liked the idea of having
a wood skeg there.
|
|
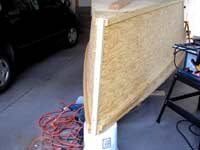
Next I attached and generously glued
and screwed a stem board on the front of the boat.
I didn't really like the flat nose look, so I will
belt sand this to a radius and finish it for a more
smooth nose look. I will also smooth out the coamings
a bit to make a better transition into that stem board.
I am waiting for the next batch of epoxy and tape
to arrive since I realized that what I had on hand
was about gone. I ordered it from my favorite site
"Duckworks" and received a nice note from
Sandra that the wheels were in motion.
| I attached
and generously glued and screwed a stem
board on the front of the boat. I didn't
really like the flat nose look, so I will
belt sand this to a radius and finish it
for a more smooth nose look. |
|
|
I am struggling a bit with weather here,
not so much with poor weather as I am with HEAT. The
garage gets up too over 100f in the day, and rarely
cools to below 85f by midnight. That heat makes a
terrible mess of epoxy if it tries to kick too quickly
as you can imagine. The current batch of epoxy was
ordered with slow hardner, and I have to make small
batches for working because I can't slow it much more.
 |
I am struggling
a bit with weather here, not so much with
poor weather as I am with HEAT. The garage
gets up too over 100f in the day, and
rarely cools to below 85f by midnight.
|
|
Well, that's the update for now. I have
enjoyed the project very much to this point, and I'm
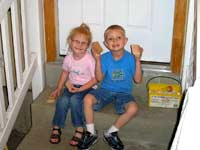
getting closer to dunking her in the drink. I threw
in a picture of my to greatest helpers, Allyson and
Jordan. I think it's fitting to have my little Allyson
working on another Allyson. (see Jim's naming of the
AF4).
| I threw in
a picture of my to greatest helpers, Allyson
and Jordan. |
|
|
I also want to mention one side note.
I have also enjoyed very much reading all the great
articles and advice on Duckworks. I never would have
attempted a project like this if it wasn't for the
great help from this site and the people who visit
and share their stories. Thanks Chuck and Sandra,
and thanks to those who have sent me encouraging words
to keep me going.
Mike Russon
mrusson@gmail.com
Click
here for Mike's first post
|